Difference between revisions of "learn:instructions-WSIstudyset"
From MGH Learn Pathology
| Line 1: | Line 1: | ||
{{DISPLAYTITLE:Submitting cases for a WSI study set}} | {{DISPLAYTITLE:Submitting cases for a WSI study set}} | ||
<br> | <br> | ||
| − | '''{{ColorText|Note: Do not initiate a case request until you are ready to drop off the slides for scanning (see Step 7 below).||red| | + | '''{{ColorText|Note: Do not initiate a case request until you are ready to drop off the slides for scanning (see Step 7 below).||red|4}}''' |
| + | <br> | ||
<br> | <br> | ||
{{ColorText|1. '''Access''' https://learn.mghpathology.org | {{ColorText|1. '''Access''' https://learn.mghpathology.org | ||
Revision as of 19:59, July 21, 2022
Note: Do not initiate a case request until you are ready to drop off the slides for scanning (see Step 7 below).
1. Access https://learn.mghpathology.org
- Log in
2. Navigate to WSI:study and find the study set where you will be adding cases.
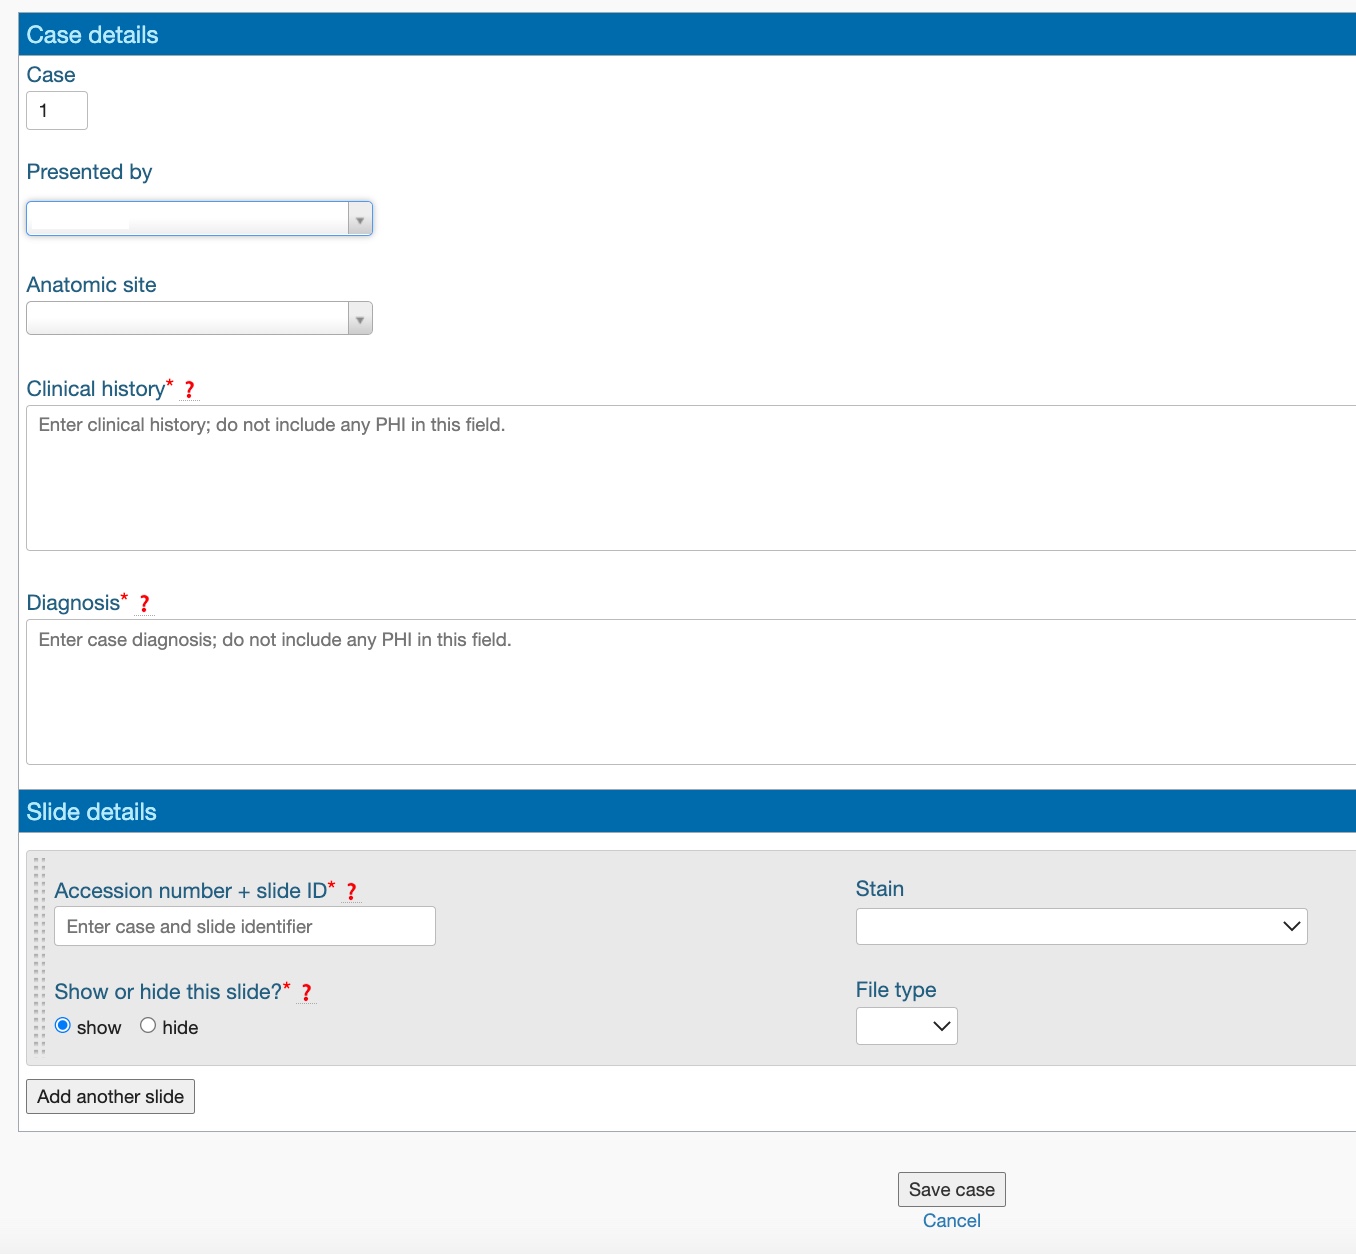
| 3. Click the Add case button to start adding content |  |
| 4. For each case, complete the clinical history and diagnosis, and provide the accession number and slide ID. Please include both the case number and slide identifier in this field exactly as they appear on the slide (for example, "BS-22-X99999 A1-1"). Multiple slides can be added for each case.
|
 |
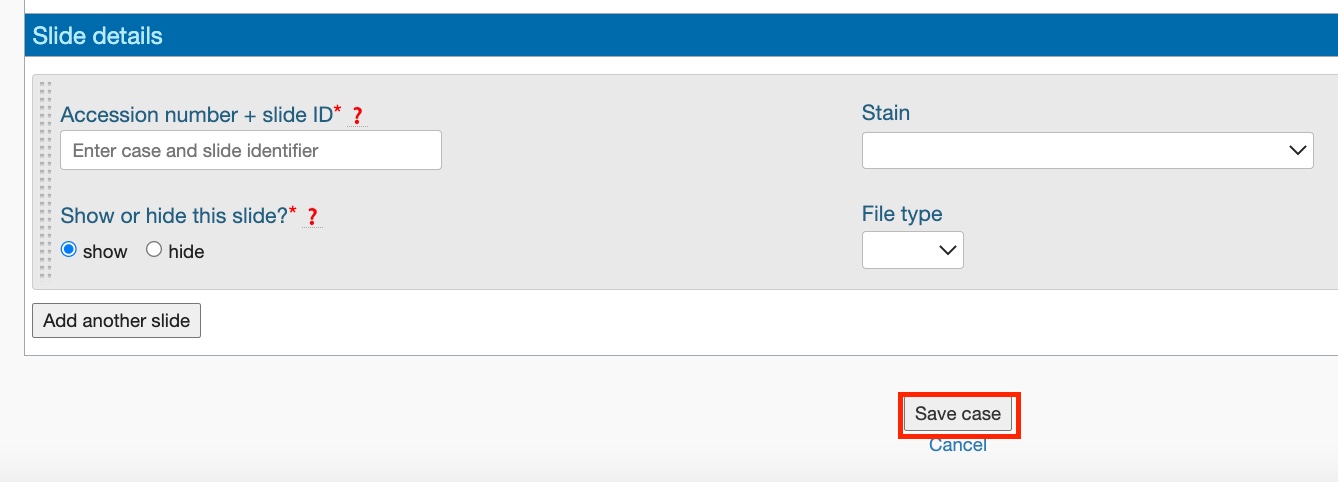
5. Save case and slide details
|
 |
| 6. Click the Submit request button
|
 |
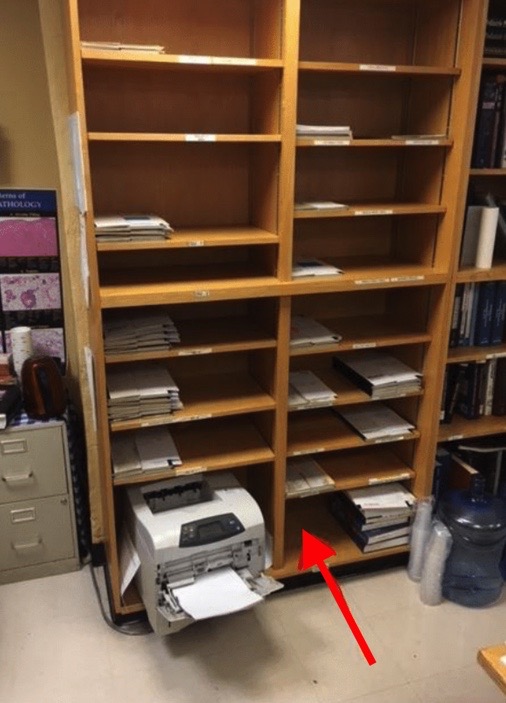
| 7. Place the tray of slides in the Whole Slide Imaging (WSI) Service Dropbox in the Resident Room, Warren 2 - bottom shelf next to a printer in the right corner of the room |  |