Difference between revisions of "learn:technicalTipSheets"
From MGH Learn Pathology
| (9 intermediate revisions by 2 users not shown) | |||
| Line 1: | Line 1: | ||
| − | __NOCACHE__{{#css: td { vertical-align: top;} }}{{DISPLAYTITLE: | + | __NOCACHE__{{#css: td { vertical-align: top;} }}{{DISPLAYTITLE:Technical tip sheets}}{{#css: td { vertical-align: top;} }} |
<br> | <br> | ||
| − | {{header|Adjust Windows 10 | + | {{header|Adjust Windows 10 Text Size}} |
{{collapsed|Tip: How to adjust text scaling in sign-out booth TVs| | {{collapsed|Tip: How to adjust text scaling in sign-out booth TVs| | ||
{{img1|1. Click on the white search box on the task bar and type “Make everything bigger”, and hit enter|Tech Tips 1.jpg}} | {{img1|1. Click on the white search box on the task bar and type “Make everything bigger”, and hit enter|Tech Tips 1.jpg}} | ||
| Line 11: | Line 11: | ||
}} | }} | ||
<br><br> | <br><br> | ||
| − | {{header|Default | + | {{header|Default Browser: Google Chrome}} |
{{collapsed|Tip: How to set Google Chrome as your default browser| | {{collapsed|Tip: How to set Google Chrome as your default browser| | ||
{{img1|1. Click on the white search box on the task bar, type “Default apps,” and hit enter|Tech Tips 4.jpg}} | {{img1|1. Click on the white search box on the task bar, type “Default apps,” and hit enter|Tech Tips 4.jpg}} | ||
| Line 20: | Line 20: | ||
}} | }} | ||
<br><br> | <br><br> | ||
| − | {{header|Olympus | + | {{header|Olympus CellSens Settings}} |
{{collapsed|Tips: How to optimize cellSens display settings| | {{collapsed|Tips: How to optimize cellSens display settings| | ||
{{img1|1. Upon opening for the first time, it is recommended to select: “Do not select simple layout” | {{img1|1. Upon opening for the first time, it is recommended to select: “Do not select simple layout” | ||
| Line 28: | Line 28: | ||
}} | }} | ||
<br><br> | <br><br> | ||
| − | {{header|Microsoft Teams | + | {{header|Teams Notifications}} |
| − | {{ | + | {{collapsed|Tip: How to turn on all notifications from Teams| |
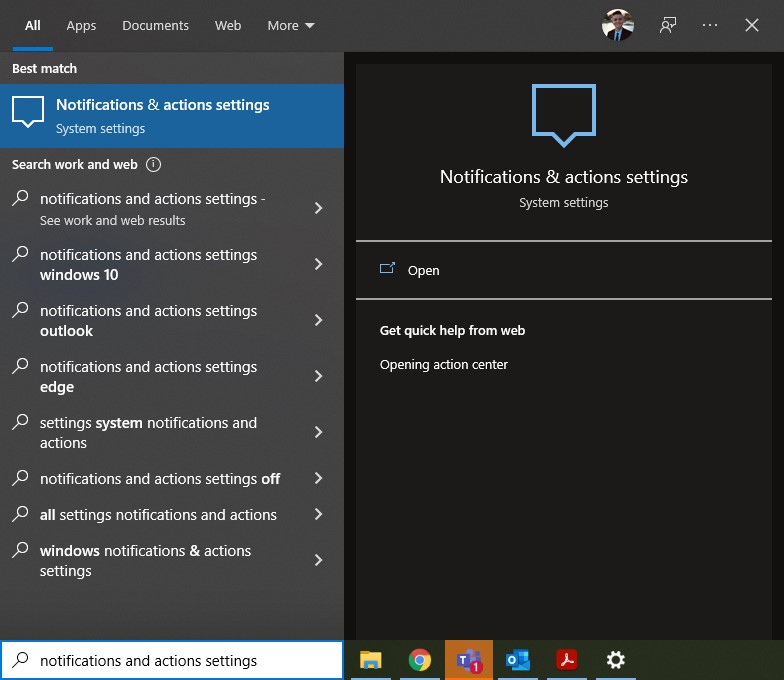
| + | {{img1|1. Click the white search box on the taskbar, type "Notifications and Actions settings" and click enter|Tech Tips 5.jpg}} | ||
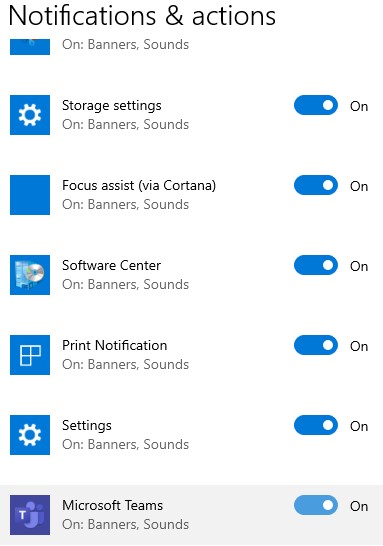
| + | {{img1|2. Scroll down and make sure the button next to Microsoft Teams is switched to On | ||
| + | <br>3. Close the window and open Teams|Tech Tips 6.jpg}} | ||
| + | {{img1|4. Click the ellipses at the top right corner next to your profile image, click settings and click the Notifications tab on the left side|Tech Tips 7.jpg}} | ||
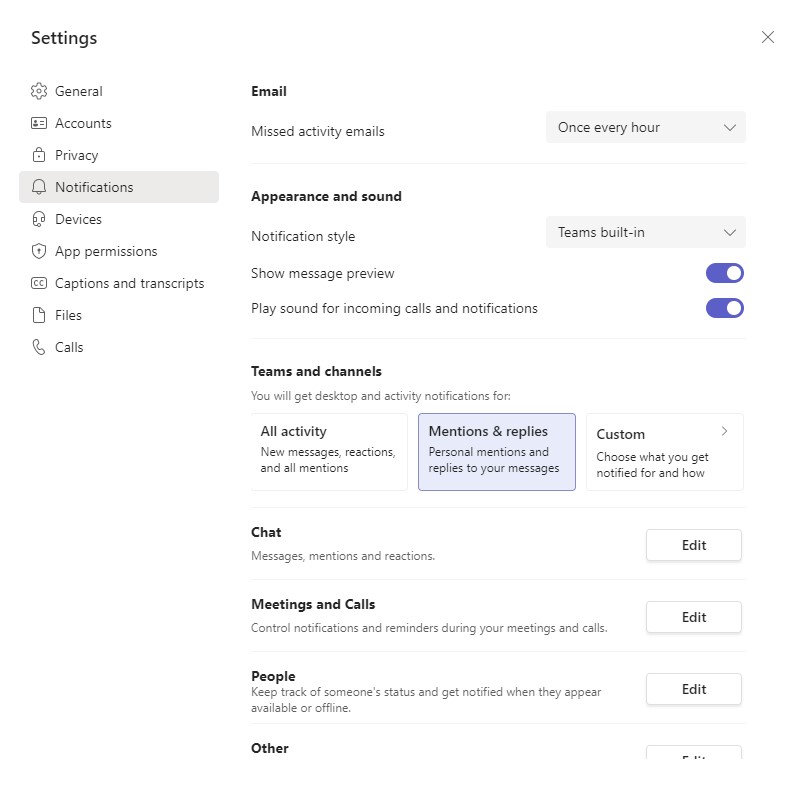
| + | {{img1|5. Choose all of these same settings as in the screenshot. <br>NOTE: you may want to change the "Missed activity emails" option to once every 10 minutes|Tech Tips 8.jpg}} | ||
| + | {{img1|6. Open the Teams tab on the left side menu and find the Team Channel you want to change notifications for|Tech Tips 9.jpg}} | ||
| + | {{img1|7. Hover over the channel and click the 3 dots, hover over Channel Notifications, click Custom|Tech Tips 10.jpg}} | ||
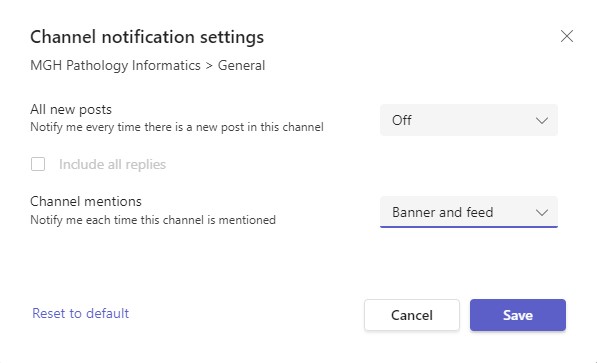
| + | {{img1|8. Click the dropdown box next to Channel Mentions, select Banner and Feed. <br>NOTE: You may also elect to enable notifications for all activity, if you do, select Banner and Feed on the All New Posts dropbown box|Tech Tips 11.jpg}} | ||
| + | }} | ||
{{:ITlink}} | {{:ITlink}} | ||
Latest revision as of 09:24, June 21, 2023
Adjust Windows 10 Text Size
Tip: How to adjust text scaling in sign-out booth TVs
| 1. Click on the white search box on the task bar and type “Make everything bigger”, and hit enter | 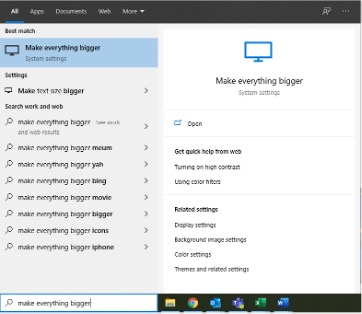 |
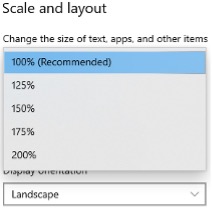
| 2. Under “Change the size of apps and text on the main display,” click the dropdown box
3. Choose 100% |
 |
| 4. Open the Start menu, click the profile icon, and click “Sign out” | 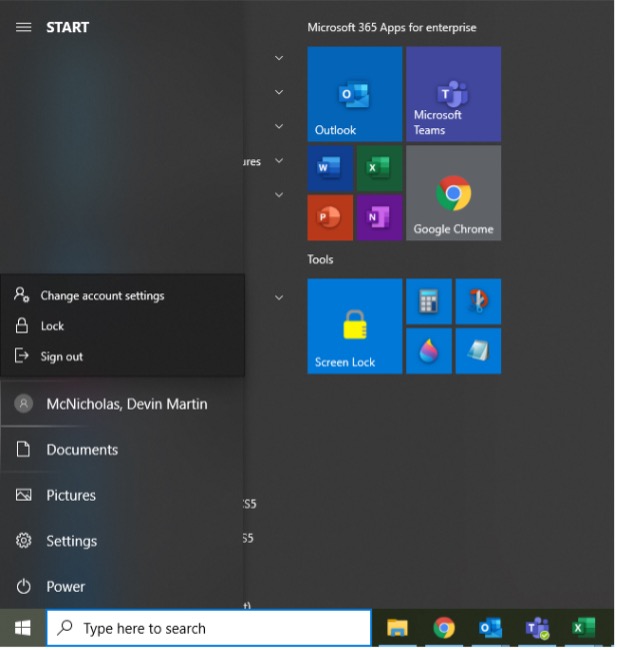 |
5. You can now log back in
Default Browser: Google Chrome
Tip: How to set Google Chrome as your default browser
| 1. Click on the white search box on the task bar, type “Default apps,” and hit enter | 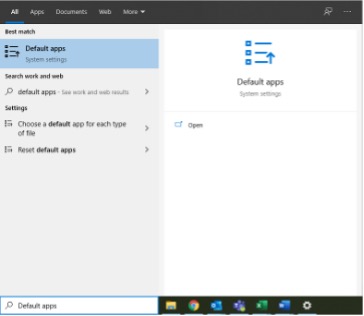 |
| 2. Scroll down to the bottom, under “Web browser,” and click the dropdown box
|
 |
Olympus CellSens Settings
Tips: How to optimize cellSens display settings
| 1. Upon opening for the first time, it is recommended to select: “Do not select simple layout”
3. Exposure Compensation: 1/3 |
 |
Teams Notifications
Tip: How to turn on all notifications from Teams
| 1. Click the white search box on the taskbar, type "Notifications and Actions settings" and click enter | |
| 2. Scroll down and make sure the button next to Microsoft Teams is switched to On
3. Close the window and open Teams |
 |
| 4. Click the ellipses at the top right corner next to your profile image, click settings and click the Notifications tab on the left side | 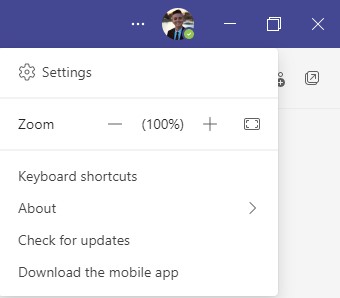 |
| 5. Choose all of these same settings as in the screenshot. NOTE: you may want to change the "Missed activity emails" option to once every 10 minutes |
 |
| 6. Open the Teams tab on the left side menu and find the Team Channel you want to change notifications for | 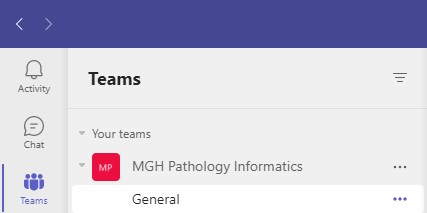 |
| 7. Hover over the channel and click the 3 dots, hover over Channel Notifications, click Custom | 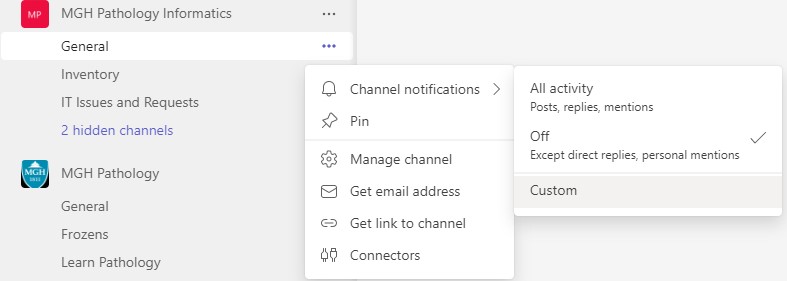 |
| 8. Click the dropdown box next to Channel Mentions, select Banner and Feed. NOTE: You may also elect to enable notifications for all activity, if you do, select Banner and Feed on the All New Posts dropbown box |
 |